We have our hands on a Raspberry Pi, the computer that costs just $35. We look at how to set up and use this rather clever British computing hardware.
What is the Raspberry Pi?
It’s a computer board designed to stimulate an interest in computer programming in schools. Many outside of the educational arena how found that this ultra-low cost piece of computing hardware can have all sorts of other uses. Here at FrequencyCast, we are exploring what this little computer is capable of.
There are two versions – The Version A is due for a later release, will not have the Ethernet network port, and will cost $25.
Raspberry Pi Model B Specs
- CPU: ARM 700MHz Processor
- Memory: 256MB RAM
- HDD: Uses SD card
- Video Out: HDMI or Composite Phono
- 2 x USB Ports
- Connectivity: 10/100MB Ethernet RJ45
- Operating System: Linux (Debian, Arch, QtonPi)
- Size 86 x 54mm
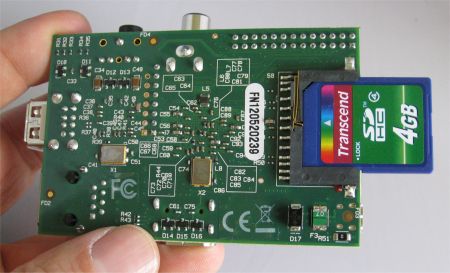
Here’s our Model B Raspberry Pi, received in May 2012:
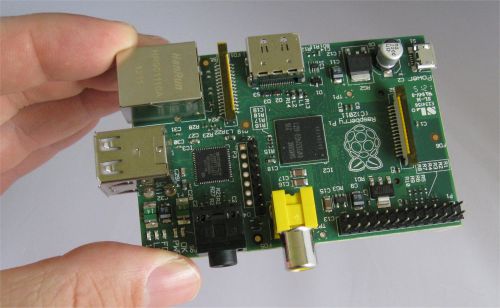
It’s a diddy little board, and it’s important to realise that all you get is the board – no monitor, storage, cables, power supply, keyboard or mouse. It’s delivered in a small jiffy bag, and here’s the packaging:

Getting Started
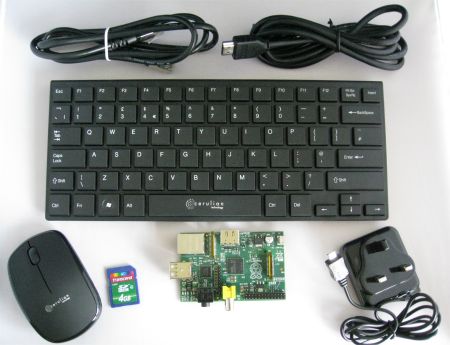
After unpacking the Pi and taking a few pics, the next job was to collect the parts needed to get us started. We made most of these lying around the office, so no big deal. Here’s what we needed:
- USB Keyboard and Mouse.
- Power supply. The board has a Micro-USB socket, and required 5V at around 1000mAh
- SD Card (At least 4GB)
- Ethernet Lead
- HDMI Lead
Setting Up The Raspberry Pi
As we expected, all you get is the board – everything else needs to be obtained as an extra. As techies, we found getting set up to be fairly straightforward, but some of what you need to do isn’t obvious, so here are some notes we made along the way:W
- Step 1. Download the operating system from www.raspberrypi.org/downloads
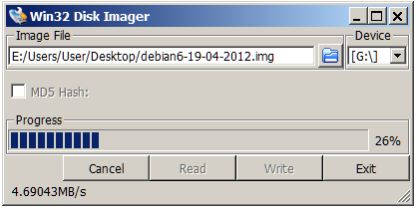
- Step 2: Install the OS onto an SD Card (at least 4GB) –
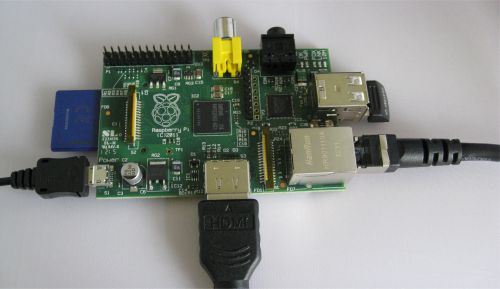
- Step 3: Connect everything up, and switch on
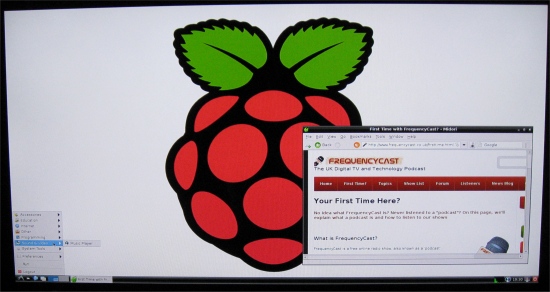
- Step 4: When you get to a prompt, to start the Pi desktop, type “startx”
This here section is a work-in-progress,, as we’re still exploring!
Audio problem. We can’t get audio to play back as yet. We’ve tried setting hdmi_drive=2 in the config.txt file. We’ll come back to this in a bit
More on the Raspberry Pi, when we’ve continued our experiments!
Related Pages:
- Raspberry Pi – First Look
- Raspberry Pi – Interview with RS Components
- FrequencyCast Show 76 – Mentioning the Raspberry Pi